FERRO VEST FOR CASTING PLATINUM AND STAINLESS STEEL
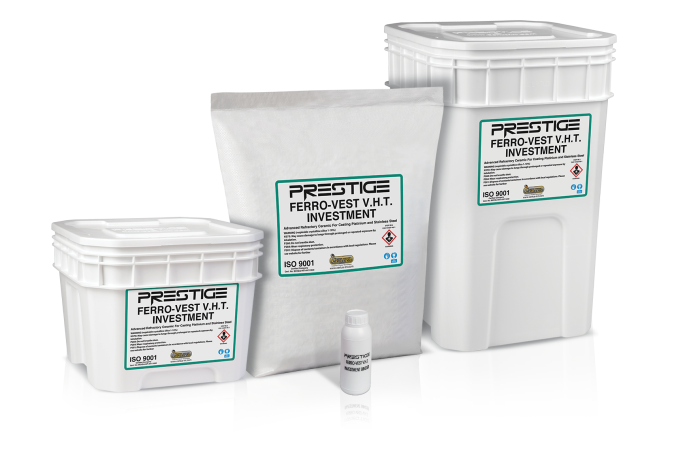
FERRO-VEST VHT is a superior two-part, high temperature investment developed to give premium results casting platinum, palladium & stainless steel and metals that melt in excess of 1500ºC. – 2732F. Ferro-Vest VHT investment powder supplies superior, consistent results and unlike other two-part high temperature investments on the market, comes complete with special proprietary additives that eliminate air bubbles and will provide a far smoother cast surface that requires less finishing than with other brands.
FEATURES
• Mixes to a consistent, easy to pour slurry
• Special additives to eliminate air bubbles on the cast surface
• Lower rise under vacuum
• Provides a super smooth cast surface that far requires less finishing
• Easier to remove than phosphate water mix and other two-part investments
• Saves the user time & money
• Online binder / water calculator available for accurate mixing calculations
BINDER PREPARATION
Ferro-vest V.H.T. binder is concentrated and must be diluted before use.
Warning: Always take the necessary safety precautions and wear protective
glasses and gloves as the binder is acidic.

The binder is diluted at the ratio of 1 part binder to 19 parts distilled water by volume. To prepare, carefully add the binder concentrate to the water.If measuring the binder by weight, use
the chart below:Ferro Vest VHT comes packaged in 22.5Kg. Poly Sacks or in ergonomic, 22.5Kg, or. plastic drums. The heavy duty plastic drums are great for containing used investment. Ferro-Vest VHT powder comes complete with enough binder concentrate to process the entire quantity of powder.

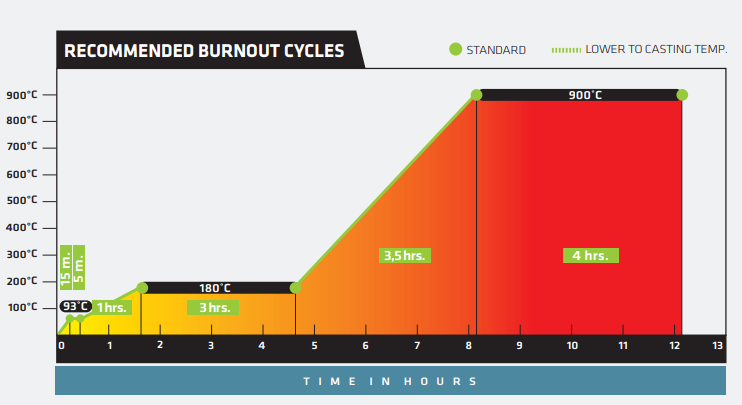
BURNOUT OF FLASKS SIZES UP TO 3”x 3” (7.62 x 7.62cm.),
1. Load flask into room temperature oven and ramp to 93C. (200F.) over thirty (30) minutes
2. Hold 93C. (200F.) for 2 hours.
3. Increase temp. to 175C. (347F.) over one (1) hour.
4. Hold 175C. (347F.) one (1) hour.
5. Ramp up to 871C. (1600F.) over five (5) hours.
6. Hold 871C. (1600F.) one (1) hour.
7. Flask is now ready to CAST
Note: If resin prints are used, replace step 3. with ramping to 371C. (700F.) over one (1) hour.
Replace step four (4) with holding at 371C. (700F.) for one (1) hour. Resume with steps five (5)
and six (6).
For 6 in x 3.5 in Flasks Volume or Weight
| Number of flasks | Weight of Powder gms | Volume of Water cc | Volume of Liquid centrate cc | Weight of Liquid concentrate gms |
|---|---|---|---|---|
| - | 1000 gms8 | 285 cc | 15 cc | 22 gms |
| 1 | 1500 | 428 | 23 | 33 |
| 2 | 3000 | 855 | 45 | 65 |
| 3 | 4500 | 1283 | 68 | 98 |
| 4 | 6000 | 1710 | 90 | 130 |
| 5 | 7500 | 2138 | 113 | 163 |
| 6 | 9000 | 2565 | 135 | 196 |
8 X 3.5 inch Flasks Volume or Weight
| Number of flasks | Weight of Powder gms | Volume of Water cc | Volume of Liquid centrate cc | Weight of Liquid concentrate gms |
|---|---|---|---|---|
| - | 1000 gms8 | 285 cc | 15 cc | 22 gms |
| 1 | 1650 | 470 | 25 | 36 |
| 2 | 3300 | 940 | 50 | 73 |
| 3 | 5000 | 1425 | 75 | 110 |
| 4 | 6600 | 1881 | 99 | 144 |
| 5 | 8250 | 1351 | 124 | 180 |
| 6 | 9900 | 2821 | 149 | 216 |
PREPARING THE FLASK
To absorb excess binder used for mixing, cut a piece of non-asbestos, cellulose paper 1” (2.54 cm.) less than the height of the flask used. Roll the paper to form a cylinder and inset into the flask leaving an equal amount of open space at the top and bottom. Add masking tape, or rubber removable extension to the top of the flask to contain the investment during vacuuming.
PREPARING THE SPRUE BASE
To prepare the sprue base, two methods may be used. For flask sizes 3” X 3” (7.62 X 7.62cm.), or less, a non-asbestos, cellulose paper 1/16” (1.588mm.) thick and 4” (10.16cm.) in width is best used (Non-asbestos, cellulose paper is available through casting supply companies, or companies supplying cellulose paper). For larger diameter flasks and heights, a standard rubber base modified with holes cut out around the circumference of the sprue button can be used.
a. For flask sizes 3” X 3” (7.62 X 7.62cm.), or less, use a special thickness of non-asbestos, cellulose paper for the base with a 0.75” (1.905cm.) hole cut in the center for wax drainage during burnout. Next, using a sticky wax, center and attach a pre-made wax button over the center hole in paper base. Attach the sprue rod to the top center of the wax button. Note: As an alternative, use a thickness of 3 automatic drip type coffee filters and cut out a 0.75” (1.905cm.) hole in the center. Next center the flask around the tree, pull up the sides of the filters and secure to the flask with strong rubber bands. (Although coffee filters work quite well, any good, thick permeable paper may be used for the base).
b. For large flasks, a rubber sprue base may be used which has been modified with holes cut out around the diameter of the center button to allow for the excess binder moisture to be wicked away during the curing process. Place a piece of cotton cloth with a hole cut out large enough to fit around the rubber button. Note: As an alternative, you can remove the rubber cone and instead use a pre-made wax button attached to the cloth that will also create a seal when the flask is placed. Last, center the flask around the tree and press it firmly into the cloth and base. When using either method, use tape or a rubber collar extension around the top of the flask to contain the investment while vacuuming.
MIXING THE INVESTMENT
• The diluted binder to powder ratio range used for mixing is 28 to 30 parts binder solution, per 100 parts powder (28 – 30/100)
• Using a heavy duty, high torque commercial mixer such as a Hobart, or Kitchen Aid, add the require amount of binder solution to the mixing bowl.
• On low speed, slowly add the powder, a little at a time to the mixing bowl. Allow each amount added to thin before adding more. The mixed slurry will appear very thick, but will thin down as it mixes, this is normal. Once all the powder has been added,increase mixing speed to a medium setting and mix for an additional 10 – 15 minutes
• Place the mixed slurry under full vacuum until it rises, breaks and begins to boil.
Continue vacuum for 2 minutes.
• Pour investment slurry gently down along the inside of the flask. Avoid directly hitting the patterns. Fill with 2” (5.08cm.), or more over the top row of patterns.
• Place the filled flasks under vacuum and vacuum for 2 minutes.
• After investing is complete, to cure place flask onto a thickness of old newspaper. If rubber bases are used, place flask onto a 3” (7.62cm.) bed of unused Ferro-Vest powder, which can be used many times over before replacing.
Leave flasks undisturbed until the slurry becomes a thick, dull gray paste. The time required to cure the investment can vary from a few hours to overnight depending on flask size used. Note: As the investment cures, it will sink down in the middle approx.
1” (2.54cm) from the top. To compensate, cover the top row of patterns with
2” (5.08cm.), or more of investment.
• When a rubber base is used, allow two additional hours after the investment appears hard before carefully removing the base.
Note: As the investment cures, it will sink down in the middle approx. 1” (2.54cm) from the top. To compensate, cover the top row of patterns with 2” (5.08cm.), or more of investment.
• When a rubber base is used, allow two additional hours after the investment appears hard before carefully removing the base

